If you own an e-commerce website, it’s important to make sure that your customers have the option of paying for their purchases through the website. To generate invoices on your ecommerce website when you do business with new customers you need software. Make sure all customers have access to such a tool as part of their account settings. Generating invoices is easy, but doing so in a way that ensures accuracy and completeness can be difficult. To help you create accurate invoices for your e-commerce website (and avoid mistakes), here’s how we recommend going about this process:
How to Generate Invoices on your E-Commerce Website
The first step to generate invoices on your ecommerce website is creating a template. You can use the invoice template you created in the previous step or create your own. Once you have created an invoice template, add it to your website so that customers can see it and select which payment method they would like to use when paying for their order. Finally, add this invoice as part of any customer’s order process by adding it as an option at checkout (e.g., “Add additional shipping costs”).

Once you have created an invoice template and added it to your website, the next step is to send this invoice. You can do so by sending an email with a link that takes customers directly to the invoice. This is an excellent way to make sure that customers see the invoice before they pay for their order.
If you are not creating invoices for each order, then you can simply send an invoice as a PDF attachment in an email. This is a good option if customers will not be paying through your website but rather sending payment directly to you via PayPal or other means.
Once your customers have paid for their order, you must create a customized invoice. This is especially important if you are using a third-party payment processor such as PayPal or Google Checkout because these companies will require the invoice before they send payment to you.
The easiest way to create a customized invoice is by using your billing software. This will allow you to automatically generate an invoice that includes all of the information from each customer’s order, including specific shipping costs. Finally, add this invoice as part of any customer’s order process by adding it as an option at checkout (e.g., “Add additional shipping costs”).
Design your invoice with your company name, address, and logo.
You’ll want to make sure that your invoice includes the following information:
- Your company name and address.
- A recognizable logo or design, if you have one.
You can also include some other important details such as how long the customer has been a customer of yours, which products they’ve purchased from you in the past and any special offers or discounts they might be eligible for based on their purchase history with your business.
Add all the customers’ information to the invoice.
Once you have your customer’s information, add all of it to the invoice. You will need the following details:
- Customer’s name
- Customer’s address
- Customer’s email address
- Customer’s phone number (optional) * Payment method
Add your products or services along with their prices.
Now that you have the plan in place, it’s time to get started on adding your products and services.
Add each product or service along with their prices. If you are selling multiple items at once, add them all together as one item and then break it down into individual items as needed (for example: if you sell a computer and an internet plan together). Add any discounts that may be applied to each product or service (such as free shipping). Make sure to include tax information if applicable—this will come back up later when creating invoices for customers who purchase from you online! Finally, make sure to include payment terms and due dates from which customers can expect payment from their credit card company/bank account/etcetera within 48 hours after receiving an invoice from yourself so that everything goes smoothly during the checkout process later on down the road when people actually place orders directly onto your website
Include any discounts you are providing along with tax information.
Discounts are a great way to increase sales.
You can apply discounts to multiple products, or you can apply them at different times of the year. You could also offer a discount on multiple payment methods, such as credit cards and PayPal accounts.
Add your payment terms and due dates you expect from your customers.
Your payment terms and due dates should be clear and concise. Payment terms are the time frame in which customers pay for your product or service, while due dates are the actual date on which they must make payment. If you want to offer discounts, make sure that you include that information in the invoice as well.
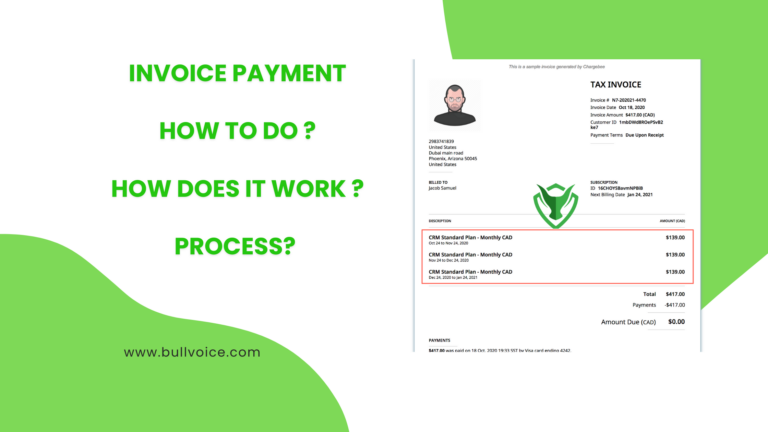
Number each invoice and make sure to include the date.
When you’re generating invoices, it’s important to have a format that is easy to read and understand. The invoice number should be bold and large, while the date should be in small print at the bottom of each page. Include these details on all your invoices:
- The header will include your company name, address, phone number or email address (if applicable). Make sure this information is clear so that customers know where they can reach out with questions or concerns related to their purchase from you.
- The footer will include any additional information such as tax ID numbers or shipping costs if applicable. This helps people who may need this information later on down during their shopping experience when making payment for their purchase!
Adding invoices to your e-commerce website helps keep track of financial transactions between you and customers in a digital format
You should add an invoice to your e-commerce website so that it keeps track of the financial transactions between you and your customers. It is a digital format which helps both you and your customers stay organized.
When a customer purchases something from your website, they will receive an email with details about their purchase as well as instructions on how they can pay for it through PayPal or credit card payment systems like VISA or MasterCard. The invoice also gives information about taxes involved in purchasing products or services from different companies that sell similar items at different rates depending on state laws regarding sales tax rates (if any). This way no one has to worry about remembering all these things since everything required right now has been organized into one place where everything can be accessed easily at any time without having to look around for anything else!
Conclusion
This is a great way to generate invoices on your e-commerce website. Hopefully, after reading this post you have learned how easy it is to add an invoice feature to your website using the platform provided by Bullvoice. If you have any questions or comments please leave them below in the comment section below so that we can continue our discussion on this topic.
 Start free


